Overview
CQ Salesforce gives your sales team easy to use software, available on any device due to it’s cloud based platform. Advanced Approvals requires several objects, buttons, and settings so that it can work with Salesforce CPQ.
There are several requirements which requires multi-level approval before a record can move ahead with any other processing. CPQ Approvals uses approval rules to determine which approvers receive an approval request and the email template used to send the requests. Upon receiving request requested owner need to approve/reject a record by logging into salesforce org.
But in the real world one approver can receive requests for multiple records, this is where Advance approval plays a major role.
Provides feature to approve or reject records by responding via email. This gives sales rep an amazing experience without having to login salesforce org every time. When an approver replies to an approval email, advance approval applies the response to a record.
Steps to Configure
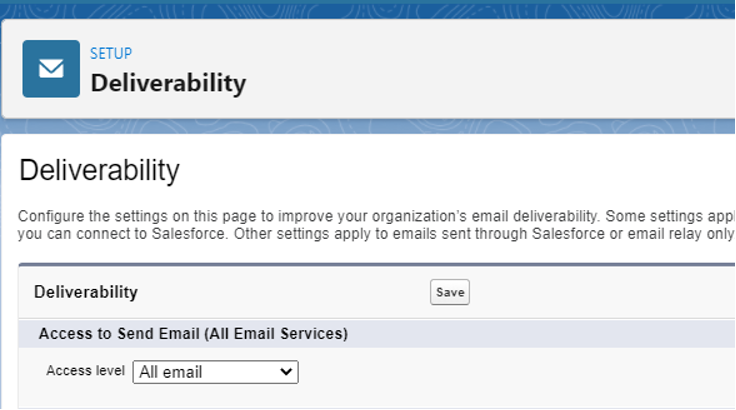
- Setup→Email→Deliverability→Access Level→All Email.
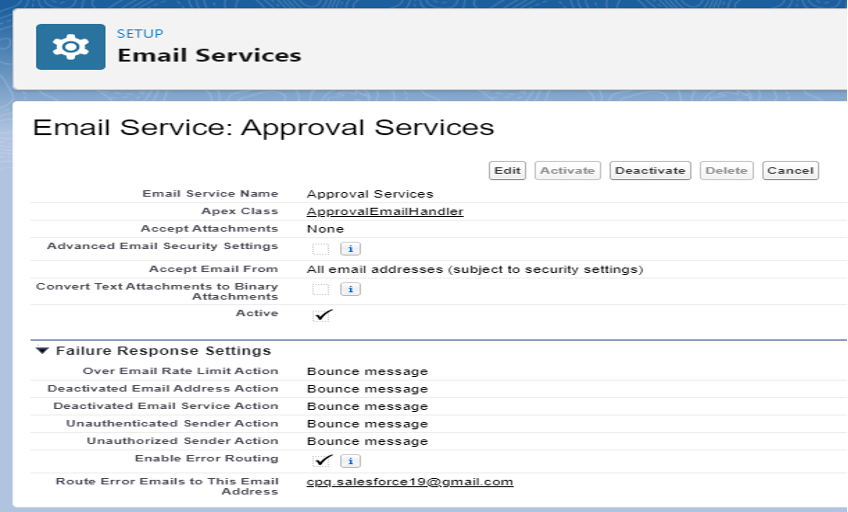
- Setup→Email Service→Define an email service.
- Select Apex class as ApprovalEmailHadler.
- Accept Email From : We can define selected email domains as(gmail.com, yahoo.com).Make sure domains are separated by comma and space. This section can be kept as blank to accept all email domains.
- Enable Active Flag.
- In Failure Response settings
- Set a Bounce message for all the action fields.
- Enable Error routing and set email address to receive error email notifications.
- Other settings can remain as-is.
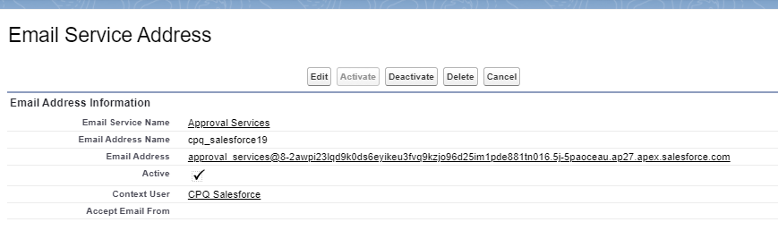
- Setup→Email Service→Email Addresses
- Provide unique email address name
- Enable Active Flag
- Provide context user: User should have necessary permission required to access objects and fields used in email template.
- Accept email from: Same as step 2.b
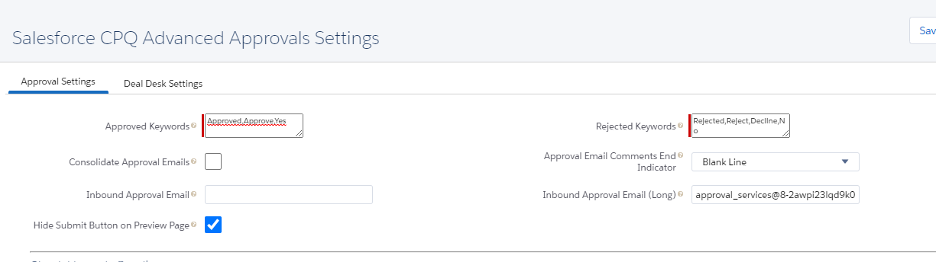
- Setup → Installed packages→Advance approval package→Configure
Connect email service to advance approvals and set approval and rejection keywords.
- Copy the address generated in step 3 field email address and paste under→ Inbound Approval Email (Long) field.
- Approved Keyword: Approved,Approve,Yes (Comma delimited list of keywords.We can include more keywords as per choice).
- Rejected Keywords: Rejected,Reject,Decline,No (Comma delimited list of keywords.We can include more keywords as per choice).
- Approval Email Comments End Indicator: Blank Line .This field indicates how comments will be captured from email.
- Setup→Classic Email Template
The email template must contain a reference to the ID of your approval record.Make sure to include below in your email template.
<p> “style=color:white” ”apex:outputText” value=”{!relatedTo.ID}” </p>Also set Related To Type to sbaa__Approval__c
If we are missing this step then any approval or rejection comments will not be captured.
Email Template sample:
<messaging:emailTemplate subject="oppapp2" recipientType="User"  relatedToType="sbaa__Approval__c">
   <messaging:htmlEmailBody>
      <html>
         Please approve
         <p style="color:white">
            <apex:outputText value="{!relatedTo.ID}"/>
         </p>
         <a href="https://cpqsalesforc19-28d-dev-ed.lightning.force.com/{!relatedTo.ID}">Visit Opportunity!</a>
      </html>
   </messaging:htmlEmailBody>
</messaging:emailTemplate>
Demonstration Steps
- Preview approval on record satisfying approval rule. Here we have built a simple approval rule on opportunity record. Click on Submit for Approval.

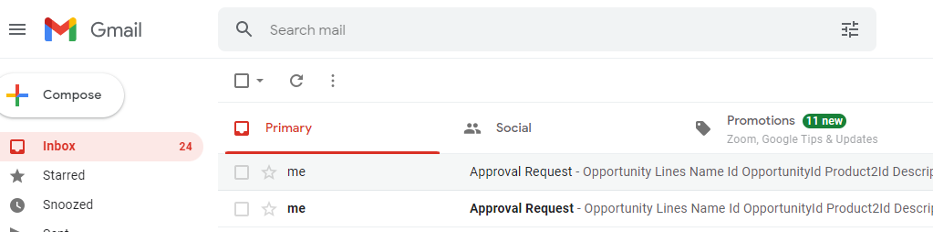
- Check for approval requests in email.
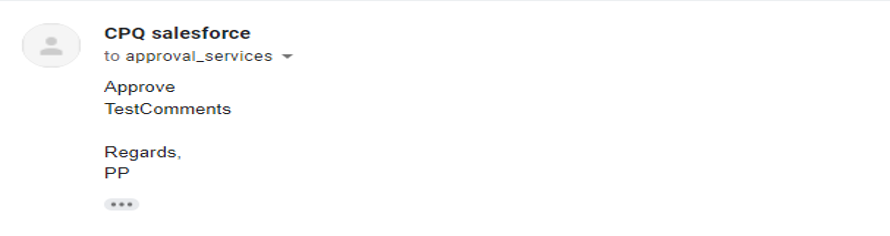
3.Respond to approval email in below format. It should be keyword followed by comments if any
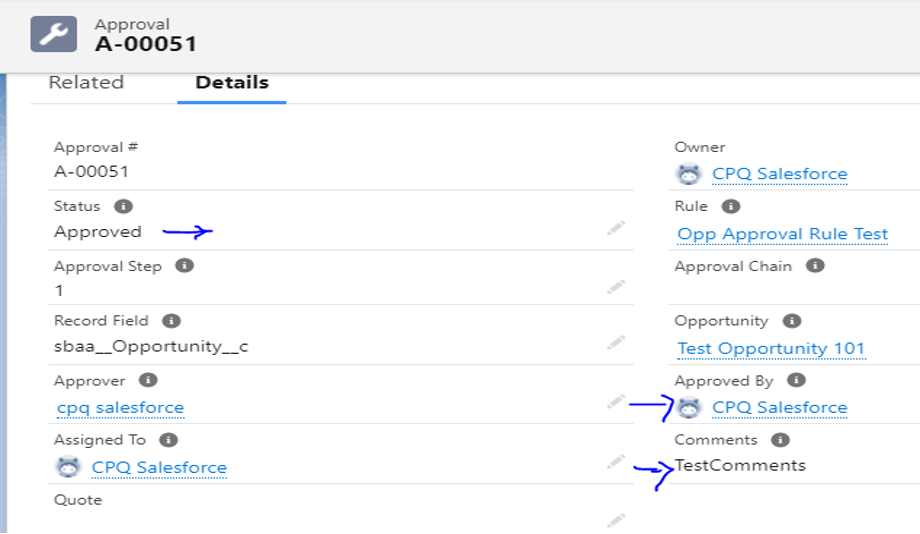
4.Verify Approval Record is now approved, Approved by and comments are captured.
So, there you have it. You’ve successfully learnt how to set up Salesforce CPQ-Advance Approvals Email.
Written exclusively for ReviewNPrep by
– Priyanka Borode (3x Salesforce Certified and Oracle Siebel Consultant)
FURTHER READING – Salesforce admin certification tips, resources, and more helpful information.