|
|
In the ever-evolving landscape of application deployment, Kubernetes has emerged as the reigning champion of container orchestration. Born from the minds of Google engineers, including Joe Beda, Kubernetes is an open-source system that has become the standard for container orchestration. It empowers developers and operations teams to manage containerized applications effortlessly.
In this blog, we’ll embark on a journey to uncover the essence of Kubernetes, explore its inherent power through a practical scenario, compare manual operations with Kubernetes automation, explain Kubernetes clusters, and delve into its advantages with code samples.
But first, let’s understand the basics.
Table of Contents
What is a Container
A container refers to a lightweight, standalone, and executable package that encapsulates an application and its dependencies, including its code, runtime, system tools, libraries, and configuration files.
Kubernetes, an open source platform, leverages containerization technology, such as Docker, to deploy and manage these containers at scale, as the fundamental unit of workloads within a Kubernetes cluster.
Containers can run on bare metal servers, virtual machines (or a physical machine), public cloud, private cloud and hybrid cloud environments.
What is a Container Image?
A container image is a lightweight, standalone, and executable package that includes everything needed to run a piece of software, including the code, runtime, system tools, system libraries, and settings.
Containerization technology, such as Docker, popularized the use of container images, and they have become a fundamental building block for modern application development and deployment.
Here are key characteristics and components of a container image:
- Application Code: The container image includes the application’s source code or binary files. This is the actual software that will run when the container is launched.
- Runtime: Container images contain a runtime environment, such as the Docker engine or containerd, which enables the execution of the application within the container.
- System Tools and Libraries: To ensure that the application runs consistently across different environments, container images include the necessary system tools and libraries. These components are isolated from the host system, preventing conflicts or dependencies on the host’s system libraries.
- Configuration Settings: Container images encapsulate configuration settings required for the application to operate correctly. This can include environment variables, configuration files, and other parameters.
- Filesystem Snapshot: Container images are often built using a layered filesystem, where each layer represents a set of changes to the filesystem. This allows for efficient sharing of common layers among multiple containers. Container images are read-only, and when a container is launched, a writable layer is added to store runtime changes.
- Metadata: Container images may include metadata such as the image name, version, and other labels to help identify and manage the image.
Application container images are typically distributed through container registries, which are repositories where images can be stored, versioned, and shared. Popular container registries include Docker Hub, Google Container Registry, and Amazon Elastic Container Registry (ECR).
What is a Pod?
In Kubernetes, a Pod is the smallest deployable unit and the basic building block for running containerized applications. A Pod represents a single instance of a process in a cluster and can contain one or more containers that share the same network namespace, storage, and other resources. Pods get their own IP address and are used to group containers that need to work together closely or share resources within the same logical application.
apiVersion: v1
kind: Pod
metadata:
  name: my-pod
spec:
  containers:
  - name: web-app
    image: my-web-app-image:1.0
  - name: sidecar-logger
    image: logging-sidecar:latest
In this example, we have a Pod named “my-pod” with two containers: “web-app” and “sidecar-logger.” These containers run on the same node, share the same network, and can access shared storage if configured.
What is a Kubernetes Cluster
A Kubernetes cluster comprises multiple machines, typically organized as:
- Master Node: The control plane of the cluster, responsible for managing worker nodes, scheduling containers, and maintaining the desired application state. It includes components like the API server, controller manager, etcd, and more.
- Worker Nodes: These machines run your application’s containers. Each worker node hosts the Kubernetes runtime (e.g., Docker), the Kubernetes agent (kubelet), and a container networking solution.
What is a Kubelet?
Kubelet is a critical component of a Kubernetes cluster responsible for the management and control of individual nodes (worker nodes) within the cluster. It acts as the primary node agent, ensuring that containers are running in Pods (the smallest deployable units in Kubernetes) as expected on a given node. Kubelet plays a crucial role in maintaining the desired state of containers and Pods on each node.
Kubelet operates by watching for changes to the desired state of Pods and containers as defined in the Kubernetes API server. When it detects changes, it takes actions to reconcile the actual state of containers and Pods on the node with the desired state.
Kubelet is a critical component of a Kubernetes node, responsible for managing containerized workloads, ensuring their health, and reporting node status back to the Kubernetes control plane. It plays a pivotal role in maintaining the overall health and functionality of a Kubernetes cluster.
The Power of Kubernetes: A Scenario
Imagine you are the lead DevOps engineer tasked with deploying and managing a complex e-commerce platform. Your application comprises microservices like the user authentication service, product catalog service, payment gateway, and a web frontend.
Without Kubernetes, your development team would be faced with the formidable challenge of managing this intricate system manually. Kubernetes enables developers
Manual vs. Kubernetes Automation
Manual Deployment:
- Provisioning Infrastructure: You’d need to set up and configure virtual machines or physical servers to host your application components. This process can be time-consuming and error-prone.
- Containerization: Installing and configuring the container runtime (e.g., Docker) on each machine is your next step.
- Application Deployment: Each microservice must be deployed individually, requiring you to manage load balancing, scaling, and health checks manually.
- Monitoring and Updates: Continuously monitoring and updating both the infrastructure and application components is a never-ending task that requires significant effort.
Kubernetes Automation:
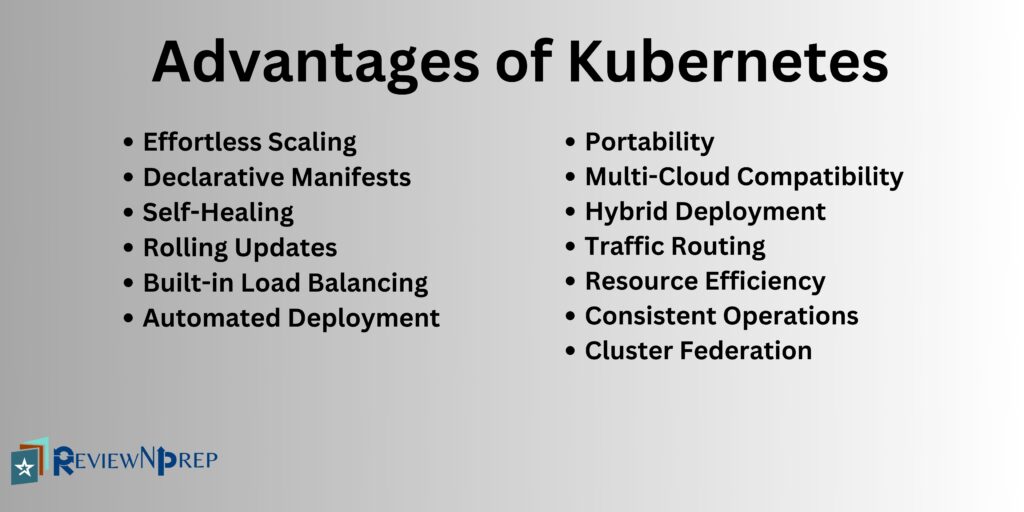
- Declarative Manifests: Define your application components and dependencies in Kubernetes YAML manifests. Here’s a simplified example for a web frontend:
apiVersion: apps/v1
kind: Deployment
metadata:
  name: frontend
spec:
  replicas: 3
  selector:
    matchLabels:
      app: frontend
  template:
    metadata:
      labels:
        app: frontend
    spec:
      containers:
      - name: web-app
        image: your-frontend-image:latest
        ports:
- containerPort: 80- Automated Deployment: Apply these manifests to your Kubernetes cluster using
kubectl apply, and Kubernetes will handle resource provisioning, container scheduling, and lifecycle management. - Effortless Scaling: Scaling your application is as simple as updating the replica count in your manifest:
spec:
replicas: 5- Built-in Load Balancing: Kubernetes automatically balances incoming traffic across container replicas:
apiVersion: v1
kind: Service
metadata:
  name: frontend-service
spec:
  selector:
    app: frontend
  ports:
    - protocol: TCP
      port: 80
      targetPort: 80
type: LoadBalancer- Self-Healing: If a container or node fails, Kubernetes replaces it automatically:
kubectl get pods
kubectl delete pod <pod-name>- Rolling Updates: Kubernetes supports rolling updates, ensuring zero-downtime deployments:
spec:
  strategy:
    type: RollingUpdate
    rollingUpdate:
      maxSurge: 1
maxUnavailable: 0- Storage and Networking: Kubernetes provides easy integration with persistent storage, network policies, and service discovery.
Kubernetes is a game-changer for deploying and managing containerized applications at scale. Its automation capabilities, declarative approach, and vast ecosystem make it the ultimate tool for achieving scalability, resilience, and efficiency in your infrastructure.
Furthermore, you can integrate security throughout the container lifecycle, making the development process more agile.
More Advantages of Kubernetes

- Portability: Kubernetes abstracts away the underlying infrastructure, allowing you to define your application’s desired state in a platform-agnostic way through YAML manifests. This means you can develop, test, and deploy your applications on different environments without significant modification.
- Multi-Cloud Compatibility: Kubernetes can manage workloads in multiple cloud providers (e.g., AWS, Azure, Google Cloud) as well as on-premises data centers. This enables organizations to avoid vendor lock-in and choose the best cloud resources for their specific needs.
- Hybrid Deployment: Organizations can use Kubernetes to manage workloads consistently across their on-premises and cloud environments. This is valuable for scenarios where certain workloads or data need to remain on-premises for compliance or latency reasons while leveraging the scalability and flexibility of the cloud for other parts of the application.
- Traffic Routing: Kubernetes offers flexible traffic routing and load balancing options, enabling you to distribute incoming requests between on-premises and cloud-based resources as needed.
- Resource Efficiency: Kubernetes optimizes resource allocation, ensuring efficient utilization of both on-premises and cloud resources. This can help control costs and make the most of available resources.
- Consistent Operations: Kubernetes provides a unified management interface and a single set of operational practices, making it easier for DevOps teams to operate and maintain applications across hybrid environments.
- Cluster Federation: Kubernetes Federation allows you to manage multiple Kubernetes clusters as a single entity. This feature simplifies the management of distributed applications across different cloud providers and on-premises locations.
Conclusion
In conclusion, whether you’re running a small-scale application or managing a complex microservices architecture, Kubernetes empowers you to focus on your code while it handles the heavy lifting of container orchestration. Embrace Kubernetes, and unlock the full potential of modern application deployment.
Further Reading:
Everything about Kubernetes volumes explained in this blog.
Check out this blog on how to choose between serverless vs containers.

